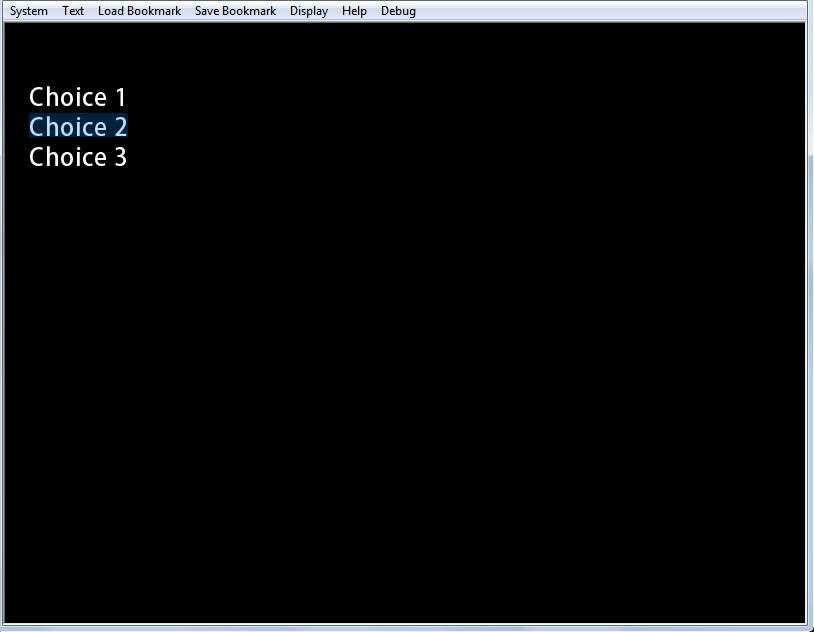
In KAG, the idea of choices is very close to a hyperlink in HTML.
Tags named link and endlink are used to write choices. When sentences, that you want to become as choices, are placed between these two tags, then it becomes possible to select the choices with the mouse or keyboard. It jumps to the label of the target attribute written, when the choice is clicked with the mouse or 'Enter' is pushed on the keyboard in the corresponding link tag.
Moreover,
It is possible to use it as described below. Please do not forget * (asterisk) to use as a label name, since it is needed for the target=*(labelname). Moreover, | (vertical bar) is not needed to specify in the target attribute after the *(labelname).
Choices do not disappear, even if you have chosen an option, when this is executed as it is.
To erase it, [cm] is usually written under the label.

Example of choices
Moreover, use the locklink tag to display the translated scenario.
This isn't specified in a normal description.
Tags named link and endlink are used to write choices. When sentences, that you want to become as choices, are placed between these two tags, then it becomes possible to select the choices with the mouse or keyboard. It jumps to the label of the target attribute written, when the choice is clicked with the mouse or 'Enter' is pushed on the keyboard in the corresponding link tag.
Moreover,
[s] tag is used to stop the choice waiting in the scenario. The scenario is executed continuously(non-stop), until [s] tag is used, when "Advance to the next choice option" is selected from the game's menu.It is possible to use it as described below. Please do not forget * (asterisk) to use as a label name, since it is needed for the target=*(labelname). Moreover, | (vertical bar) is not needed to specify in the target attribute after the *(labelname).
[wait time=200]

*start|Start

[cm]

[link target=*select1]Choice 1[endlink][r]

[link target=*select2]Choice 2[endlink][r]

[link target=*select3]Choice 3[endlink][r]

[s]


*select1

Choice 1 was selected. [l]

[s]


*select2

Choice 2 was selected. [l]

[s]


*select3

Choice 3 was selected. [l]

[s]
Choices do not disappear, even if you have chosen an option, when this is executed as it is.
To erase it, [cm] is usually written under the label.
[wait time=200]

*start|Start

[cm]

[link target=*select1]Choice 1[endlink][r]

[link target=*select2]Choice 2[endlink][r]

[link target=*select3]Choice 3[endlink][r]

[s]


*select1

[cm]

Choice 1 was selected. [l]

[s]


*select2

[cm]

Choice 2 was selected. [l]

[s]


*select3

[cm]

Choice 3 was selected. [l]

[s]

Example of choices
Note
Once selected, new choices are displayed until unlocklink tag is executed.Moreover, use the locklink tag to display the translated scenario.
This isn't specified in a normal description.